Showing posts with label Christmas Cards. Show all posts

Squirrel Christmas Card

I was thinking about making this card for a while. It was only when I sat down to actually work out the idea in paper that it appeared as a bushy-tailed squirrel holding a nut. 


Squirrel - Christmas 2016


Getting it to look right was tricky because of the angles of the folds and the different colour of the tail.  I ended up making around 18 trial versions until I was happy with this one.

When the construction was right I ordered the paper I needed, along with square envelopes of the correct size. I then cut the shape out, scored, folded and used a ticket punch to make the eye.


Working it out

Making the cards
                                                                                 
Shelf inhabitant
Here is a link to some of my previous papercut Christmas cards.

Merry Christmas!

Snowflake Christmas card and how to make one


This year's Christmas card was inspired by work I'd done for Lipsy in the Autumn.  No need to worry about inconsistency as snowflakes are all individual.

Just a footnote; even though they folded and fitted into a small envelope and opened out as usual, they were too fat for letter post and cost me a fortune to send out. Oh well, it was Christmas!


Instructions of how to make your own snowflake are included below.


Highly sprung snowflakes
This is a standard 30cm ruler to give scale
I added a small card with different greetings on for family friends and clients


Instructions were on the reverse
                                                                          
A few of the international cards only just fitted the postage on


How to make a paper snowflake in 10 easy steps.

You'll need:

White paper measuring 60 cm x 6.5cm (I've used a 200+ gsm)
White pva glue
Ruler
Pencil
Sharp knife (and something to cut on - use a cutting mat or breadboard)
Paperclip

Method:

1. 
Fold the paper into three. 
Measure 30cm for each fold. 


2. 
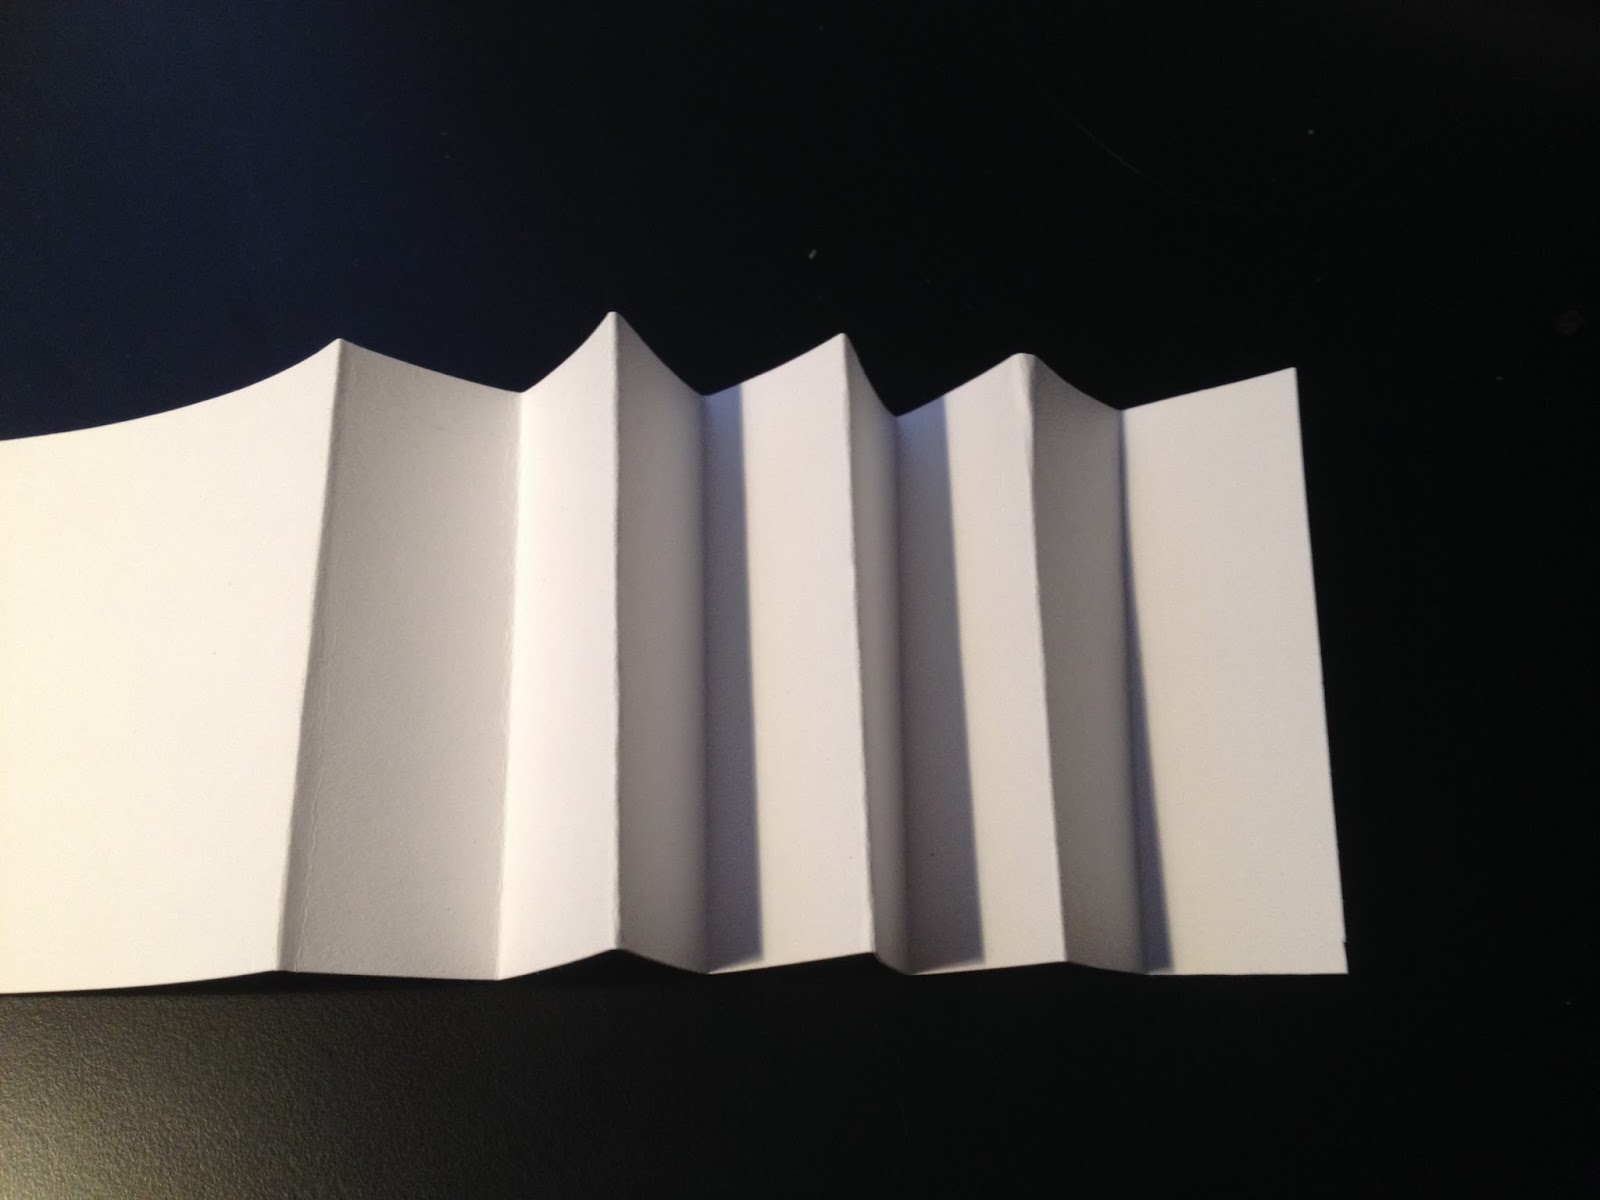
Fold one third in two. 
Then fold half of that in two. 
Then the last quarter in two again.


3. 
You can then fold it along the length equally using this method.


4. 
Do this with each of the three sections until it looks like the one below.


5. 
Gather it all together and secure it with a paperclip. 
Apply the glue liberally to make quite a thick layer and leave to dry.


6. 
When it is dry the glue will be clear in appearance. 
Remove the paperclip.


7. 
This is where you need a very sharp knife - I use a scalpel. 
Hold the folded paper down firmly and be firm, but keep the blade away from your fingers! 


8. 
I cut away on both sides, but am careful to keep the connected folds big enough to hold the thing together. 
So just shapes. 
You can always cut more away if you wish, you can't replace it once it's gone. 


9. 
Open it out to check what it looks like from time to time. 
You can experiment to create many shapes.


10. 
You can secure the finished papercut with a paperclip, from which you can also hang the snowflake.


For blogs about other Christmas cards I've designed please click here.

Dove Christmas Card

For Christmas 2014 I designed a paper dove card. 
Below are some other paper animals from previous years. 


2014 Dove

2013 Camel

2012 Turkey


2011 Penguins


2010 Robin

2009 Polar Bear
And baby

2008 Reindeer


Emperor Penguin Christmas Card


This year's Christmas card is a penguin, plain and simple. It's the fourth year I have managed to design a 3-dimensional animal for the annual family greeting. There's no particular reason that I choose animals, they just work well and seem friendly. For the design the only criteria I conform to is firstly an easy construction, simply because I have to make a large quantity, secondly that they are printed on one side of a piece of paper (this includes the greeting) and thirdly that they fold flat to fit into envelopes. 


On the technical side I work out the mechanics of the prototype then scan the plan onto my computer. I do a few things in Photoshop and Illustrator before printing the result onto cartridge paper. Then there's a bit of cutting, scoring and folding. I decided to use felt tip for the penguin's crown as it made it look more like a party hat. 

As well as family and friends I send them out to clients where they tend to go down well. They are often mentioned and it's extremely pleasing when recipients keep them.

My blogs about previous Christmas card designs can be found here.


Finally, I would like to wish you all very merry Christmas!                              

Christmas Cards


I've recently rediscovered the delights of linocuts. So this year I've decided to have a go at printing the family Christmas card instead of using the photocopier. I knew I wanted to do a bird, but was having problems making it in the style of my previous designs. Most things come with trial and error, so when my inspiration finally came I sketched my design with a pencil straight onto the lino's surface and began to cut. I printed the result onto bright card using a two colour ink fade then hung them up to dry. This took about 2 days, after which I cut, scored and folded each one. Finally, I tucked my message into a slit in the beak. 
Looking at the birds together I think I'm most pleased with the variation and folksy look of them.
For those of you who are interested in linocutting, I used a relatively new material which comes from Japan. It doesn't bow like lino, it's easy to cut and it takes the ink exceptionally well. I found it at Intaglio.
Season's greetings to you all!


Greeting Card Animals

The advent of spring is upon us and winter is nearly gone, so forgive me for being unseasonal here in showing my last two years' Christmas cards. The Reindeer and the Polar bear + baby are the result of a long term project I've been working on for years now. 
My aim is to design 3D paper animals that can easily be cut out and folded, yet involve no sticking. These Christmas card designs differed from the ones in the pipeline, as they needed to fit into an envelope for easy posting.


Polar bear Christmas 2009


Baby bear was designed for the recipient to cut out and fold for themselves.


Reindeer Christmas 2008

All artwork was designed to fit onto one piece of A4 120gsm white photocopy paper, (which included the greeting) and was printed off on the home printer.
More 3D sculptural animals are currently in production.